

I built a Launchpad platform in 3 days with $400
TechFlow Selected TechFlow Selected
I built a Launchpad platform in 3 days with $400
Sharing my general framework from "idea" to "product."
Author: ultra
Translation: Luffy, Foresight News
Last weekend, I worked overtime to build Blind—just to prove that building meaningful products doesn’t require millions in funding, months of labor, or even a team.
Blind is a token launchpad built on Base and powered by Flaunch’s infrastructure. It introduces a novel mechanism: allowing token creators to choose which personal information they want to disclose when launching tokens.
This way, creators can leverage their reputation or credentials without fully revealing their real identities or taking on the usual burdens of being a “token spokesperson.” Additionally, creators can set presale eligibility criteria, allowing only users who meet minimum requirements to participate.
Purpose of This Article
This article shares my general framework for turning an idea into a product.
As I often say, the next 6–12 months represent a golden window for bringing ideas to life. With AI tools, turning concepts into reality has never been easier—yet few realize this. For those willing to invest time, it's a massive arbitrage opportunity.
I hope this piece inspires more people to try vibecoding—bringing their ideas to life—and helps return Web3 to its roots: a space led by independent developers and small teams, where innovation happens daily.
This article assumes readers have basic technical knowledge, including familiarity with development tools, code repository management, and common components.
Phase 0: Inspiration
The concept of social capital gating had been brewing in my mind for months. While frequently using tools like Kaito, Ethos, fantasy.top, and time.fun, and researching SocialFi metrics, one question kept coming up: Why hasn’t anyone built a dashboard that aggregates user profiles across all these platforms, using scores and data to evaluate user credibility?
Over the past six months, the "creator metrics" space has rapidly emerged, enabling people to assess the value of individuals or accounts through multiple data dimensions.
So, could we use these metrics as participation thresholds—such as entry conditions for token launches? And could creators decide which metrics to disclose publicly while keeping their real identities hidden?
What finally pushed me to start building was seeing Pump.fun raise $500 million in an ICO, followed by heaven raising $20 million. To me, neither product seemed technically complex—so why such extreme valuations? And there are many other successful launch platforms with similar funding outcomes.
Fairly speaking, in this space, we’ve already stopped rationalizing token valuation logic. Often, valuations make no sense at all.
Still, this sparked a personal challenge: Could I build a comparable product over a single weekend, with minimal cost and no external help?
My goal wasn’t to create a commercial product, launch a token, or make money. It was to prove it *can* be done—and inspire others to follow suit.
Phase 1: Problem Decomposition
Once I had the idea, the first step was breaking it down into core components and making decisions for each. For a "launchpad with social access control," I identified the following sub-problems:
Choice of On-Chain Tech Stack
The primary decision: which chain to deploy on. This choice affects every subsequent implementation step. At the time, two clear options stood out: Solana and Base.
Solana
Advantages:
-
Highest trading volume for meme coins;
-
Spotlight effect: any project deployed here gains visibility easily.
Disadvantages:
-
Low flexibility—must adhere to existing token standards;
-
High development complexity requiring numerous workarounds;
-
Longer development cycle;
-
Expensive and unstable infrastructure costs.
Base
Advantages:
-
Highest meme coin trading volume among EVM chains;
-
Strong developer support;
-
Excellent EVM development experience;
-
Can directly reuse existing infrastructure.
Disadvantages:
-
Meme coin trading volume lower than Solana.
Since Blind wasn't a commercial project but just a weekend experiment, we didn’t need to consider potential financial returns. We simply chose the option that wouldn’t make development painful.
We ultimately selected EVM. When developing blockchain applications, EVM offers the most mature and user-friendly infrastructure, enabling fast, efficient, and smart progress.
Reusable Existing Infrastructure
After choosing the chain, the next step was finding reusable SDKs (software development kits) or ready-made contracts to avoid coding from scratch. Especially for smart contracts, prioritizing audited contracts greatly reduces security risks.
Luckily, the EVM ecosystem offers abundant reusable resources. We had two main options:
-
Build on top of DEXs like Uniswap, implementing all access control logic on Uniswap V4;
-
Use existing launchpad infrastructure (like Flaunch’s SDK), which already includes indexing, metadata upload, launch curve configuration, presale stage management, and more.
We again chose the path of least resistance: building on Flaunch. This allowed us to focus solely on the social aspects and frontend presentation, avoiding wasted time and money on foundational features like liquidity pool setup, indexing infrastructure, or revenue-sharing contracts.
“If someone smarter has already done the work, why reinvent the wheel?”
Token Deployment Method
After selecting the SDK, we needed to decide who would actually deploy the tokens. Two approaches were possible:
Option 1: Users initiate transactions to deploy tokens
-
Requires developing a proxy contract to ensure users’ launch parameters comply with platform rules;
-
Need a way to track all deployed tokens within Flaunch’s existing subgraph indexer.
Option 2: Users submit a “deployment request” to the backend, which a bot executes
-
All tokens deployed via the platform’s own EOA (externally owned account), making it easy to track all launched tokens in the indexer;
-
Ensures all launches follow standardized parameters.
We chose the “backend deployment” approach—it simplifies token tracking, enables stricter control over what and how things are deployed, and leaves room for future upgrades.
All tokens will be deployed via wallets controlled by the backend.
In essence, we “streamlined the Flaunch SDK,” removing unnecessary features and keeping only the parts callable via backend requests.
Social Data Collection
Next, we focused on social functionality. We needed to identify which data dimensions would add value to the launchpad. The ideal combination should reflect both “account status” and “user reputation.”
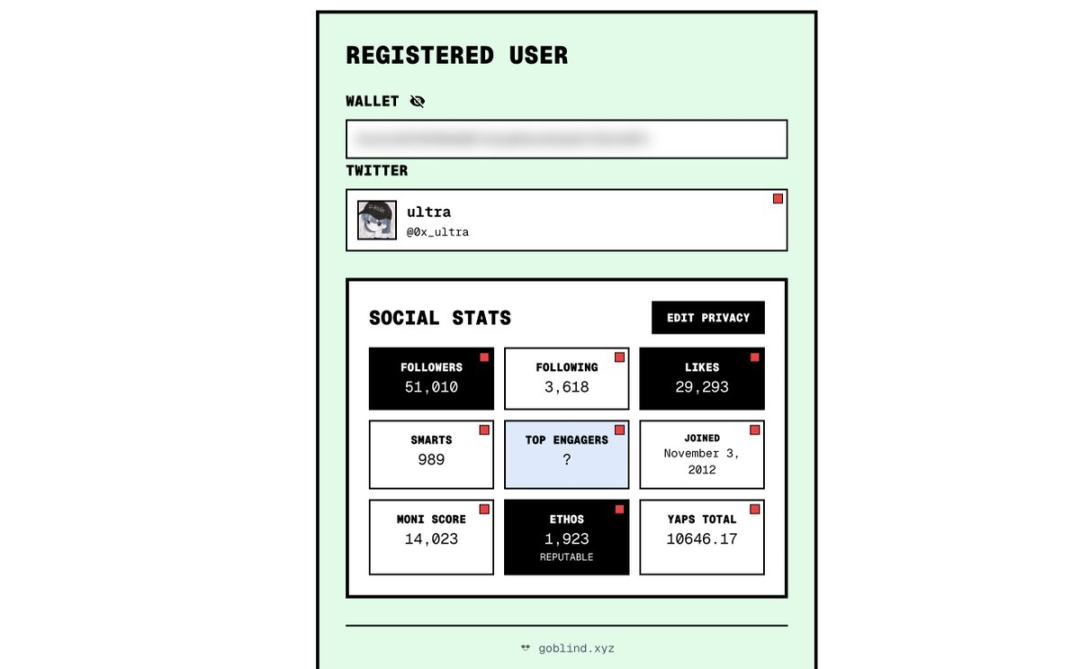
Ultimately, I settled on these data points:
-
Follower count (X Platform API)
-
Following count (X Platform API)
-
Account age (X Platform API)
-
Like count (X Platform API)
-
High-value follower count (Moni API)
-
Core engagement user count (Moni API)
-
Reputation score (Ethos API)
-
Content virality score (Kaito API)
This combination allows creators to demonstrate their credibility across multiple dimensions—standing out without fully exposing their identity.
Social Data Processing & Privacy Protection
During registration, we collect all the above data—but how should privacy be designed?
Our principle: “privacy-first by default.” All data remains private unless explicitly disclosed by the user. Users can choose whether to reveal each data point and can opt for “fuzzy display” (e.g., showing “40k+” instead of exactly 43,000 followers), offering semi-anonymous references.
Should data processing rely on “centralized backend + HTTPS requests,” or use complex zero-knowledge proof technology?
We combined both:
-
All data stored in a Postgres database; frontend fetches info via HTTPS APIs directly from the DB. Presale access control follows this flow:
-
User wants to join presale → requests an “access proof” from the platform backend;
-
Backend verifies if user meets creator-set thresholds;
-
Backend returns a signed message containing “user wallet address + expiration timestamp”;
-
Smart contract validates signature authenticity.
Phase 2: Development & Implementation
Before starting development, list the required “toolkit”:
-
Railway (backend hosting): $20/month
-
Vercel (frontend hosting): $15/month
-
Cursor (development tool, with Claude 4 MAX mode): $200/month + $100 credits
-
Domain name: $30/year
-
X Premium+ (account subscription, for increased visibility and long-form posts): $40/month
-
ChatGPT: for logo and brand design, replaceable with other familiar tools
Total cost ~$405 (assuming Vercel stays within subscription limits).
Note: To speed up development, I used more Cursor credits than planned (enabling MAX models). If speed isn’t critical, cheaper models suffice.
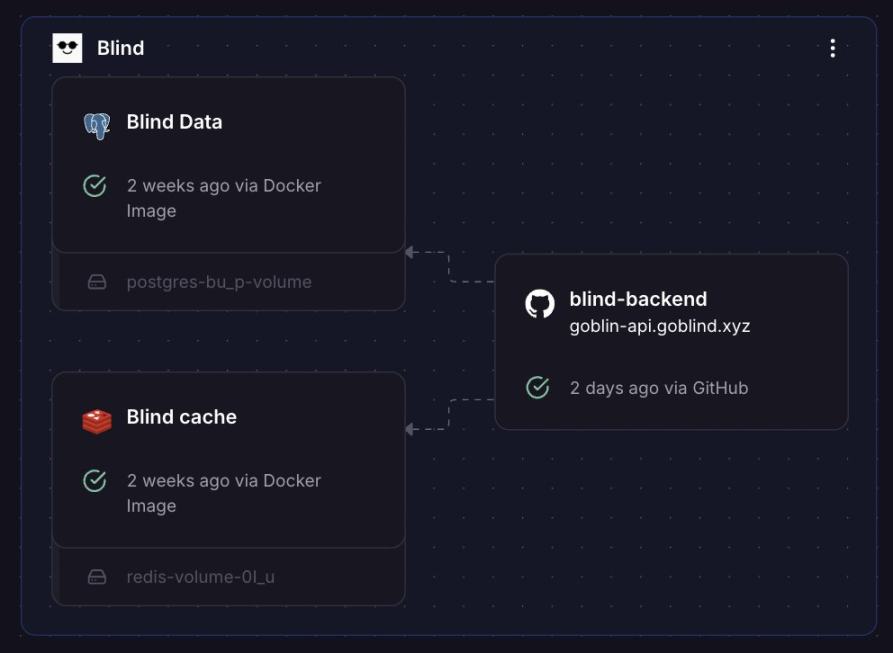
Architecture Design
Most projects need four core components:
-
Frontend: hosted on Vercel (separate GitHub repo);
-
Backend: hosted on Railway (separate GitHub repo);
-
Database: Postgres on Railway;
-
Cache: Redis on Railway.
In short, Vercel handles all frontend functions; Railway securely hosts core services invisible to users—data processing, token deployment, APIs, caching, etc.
Most backend architectures look something like this (yes, data lives in a “ball”).
Development Order
I always recommend building core functionality first, then the frontend.
For this project, the most critical function (and the one needing early compatibility testing) was token issuance.
Since we decided “backend EOA handles token deployment,” we created a new git repo for the backend and started diving into Flaunch SDK docs.
The documentation outlines all available launch configurations and provides integration-friendly code snippets. They also offer APIs for data retrieval and a subgraph that automatically indexes everything happening on Flaunch—including tokens launched from the Blind frontend.
1) Test Token Issuance
In the new backend repo, the first step was setting up a local environment to test if tokens could be issued successfully via the SDK. We wrote a simple Node script, later refactored into Express server endpoints—calling the endpoint with specified parameters triggers token deployment.
This step is actually very straightforward—likely solvable with one prompt and minor debugging.
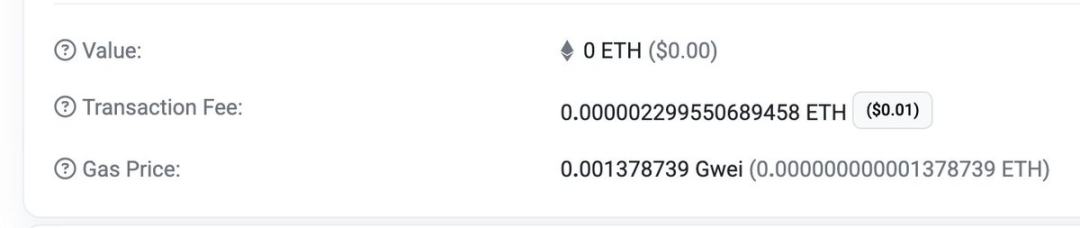
And gas fees for token deployment are under $0.01! Meaning we can offer completely free token deployment to users.
2) Fetch Social Data
Next, develop another core feature: social scoring. For each selected data dimension, review the respective API docs, then create an endpoint in the Express server that returns all data based on username. Store this data in the Postgres database on Railway.

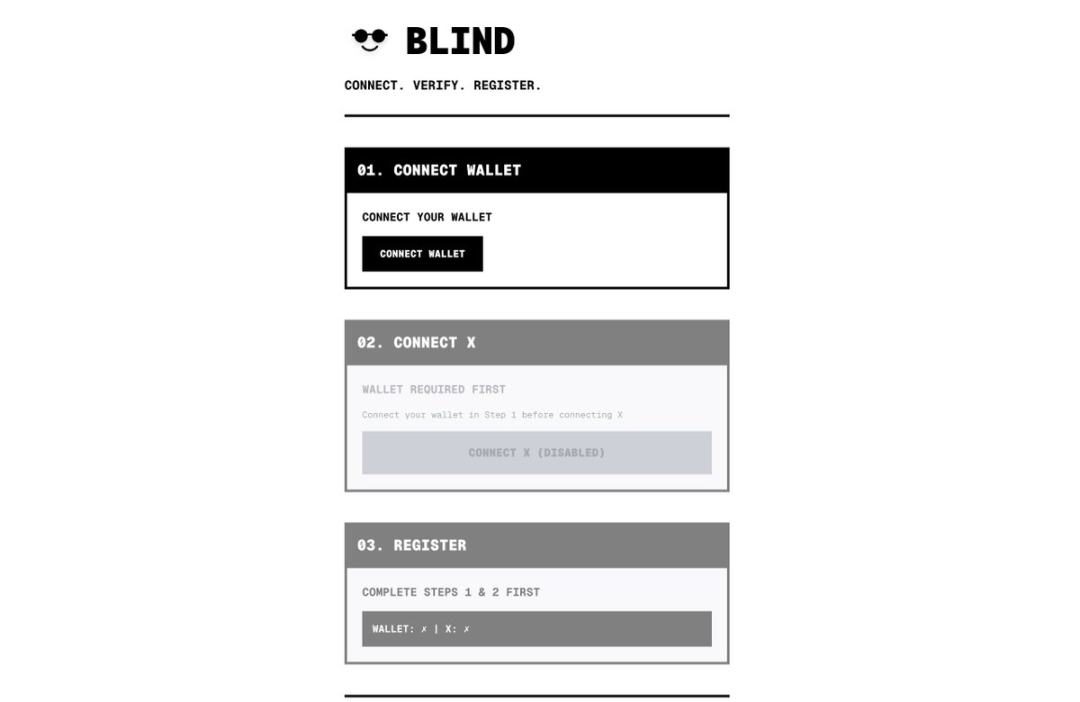
3) Registration Flow
At this stage, development gets slightly more complex, requiring parallel work on the frontend repo. We chose Next.js as the frontend framework due to its excellent Vercel integration and middleware-based authentication support.
In the registration flow, users first connect their wallet, authenticate via X, then call our endpoint to register.
We reviewed X’s authentication API docs, implemented a simple registration page on the frontend, and created a registration endpoint in the backend repo.
During registration, we extract all data from step 2), store it in the database, and add a wallet address field. All requests to the registration endpoint must pass both X key authentication and wallet signature verification to prevent impersonation.
Once working, we added authentication to the token deployment endpoint so only registered users can deploy tokens. For all other endpoints beyond registration, we opted for wallet signature authentication only—avoiding repeated X logins.
4) Privacy Settings
After completing registration and data storage, the next step is privacy settings:
-
Create a data visibility table in the database (all data private by default);
-
Develop a privacy-setting update interface callable by authenticated users;
-
Write helper functions to enable fuzzy data display;
-
Build a frontend component for editing privacy settings.
5) Interface Checks & Optimization
With core services ready, perform these optimizations:
All server functions are ready. Now ensure all endpoints use authentication where needed and don’t leak personal data during public access. Use Redis caching to optimize certain APIs and reduce server load. Finally, add several APIs to retrieve public user profiles, token owners and their data, currency data, etc.
6) Frontend Development
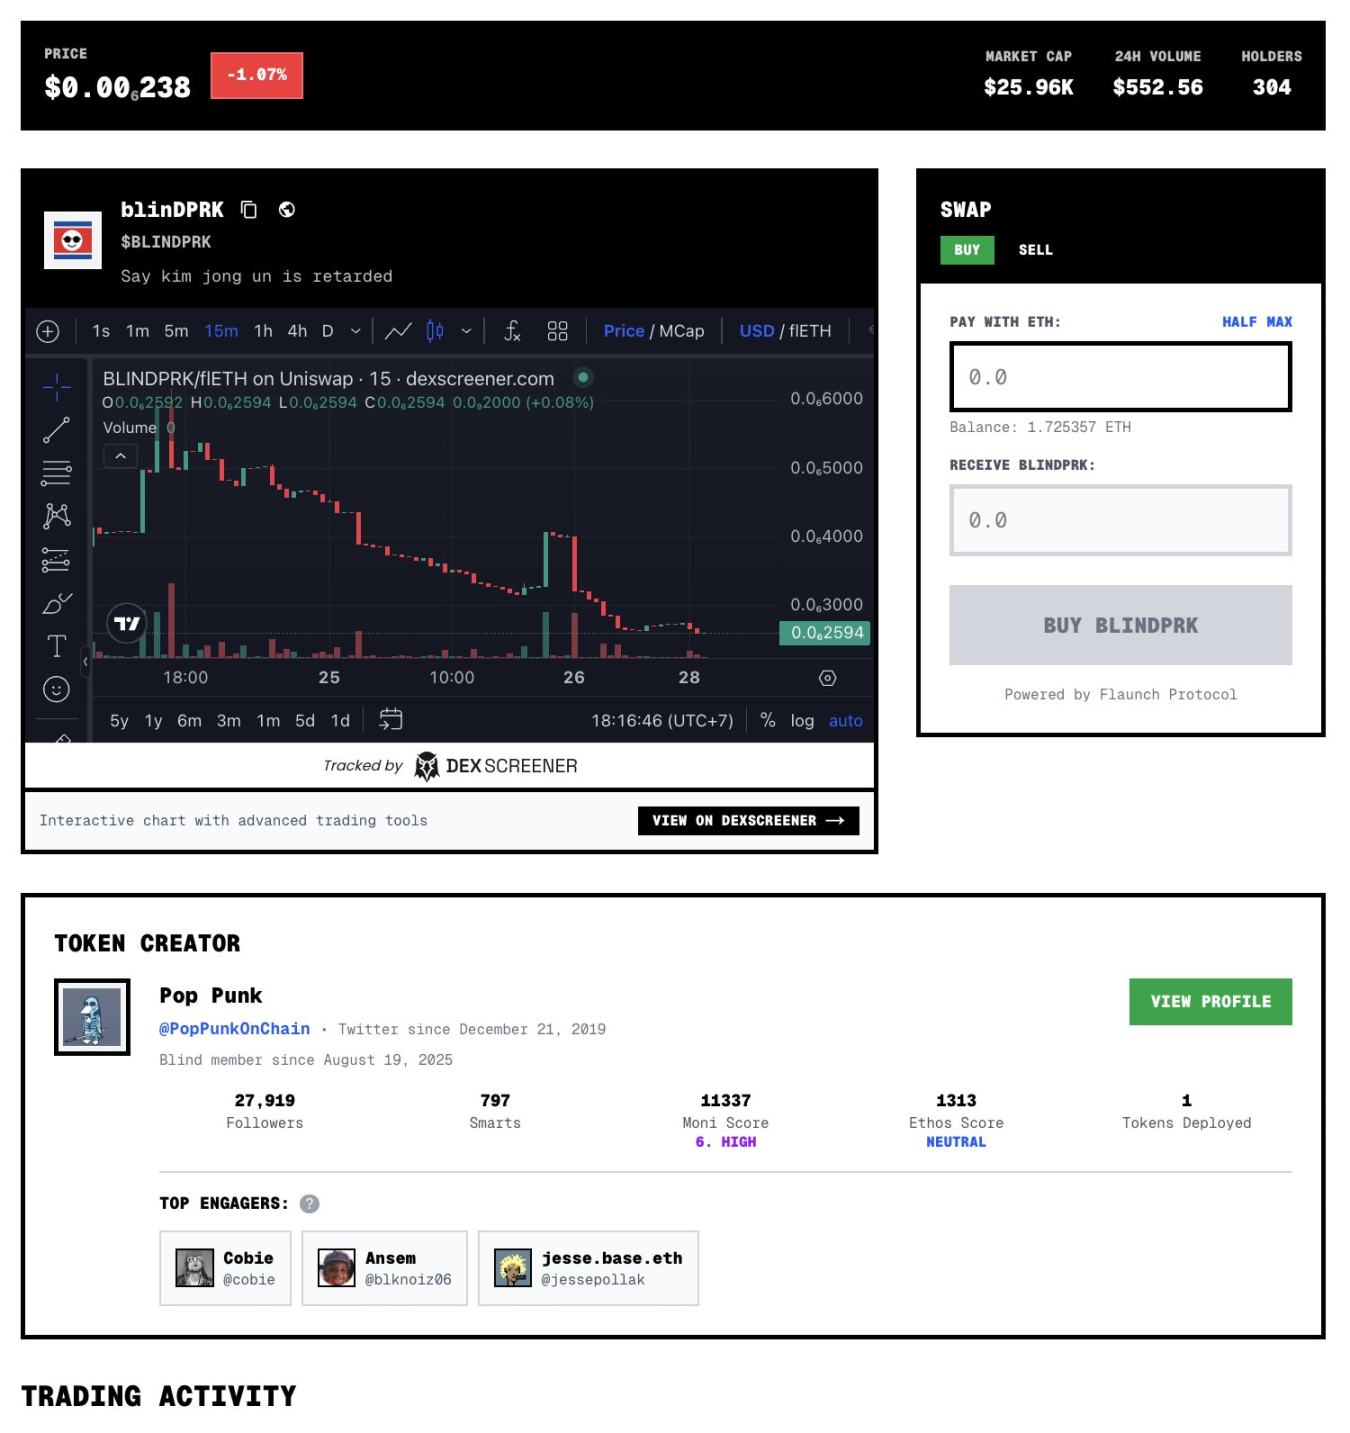
Time to build a beautiful website. Define themes, pages to display, and begin removing “private” elements. For custom-sorted token lists and other data, rely on Flaunch’s subgraph, filtering by our EOA as the deployer. For token detail pages, embed a simple DexScreener iframe for quick chart display.
7) Testing
Everything is finally ready. Test user flows, deploy all components to Vercel and Railway, and share access with friends for feedback. Goal: replicate a production-grade environment.
8) Optimize Based on Feedback
The final step before launch.
Phase 3: Public Launch
Public launch involves two steps: branding first, then marketing.
Branding
I didn’t mention branding earlier because it can be done anytime—but ideally before frontend development. Core brand elements (name, logo, colors, domain) should follow the “simple and recognizable” principle.
A personal favorite tactic: “single-word name + domain punning”:
-
Project name: “Blind” (meaning “blind investment”—hinting at buying tokens with limited information);
-
Domain: goblind.xyz—a clever blend of “go blind” (blind investing), “goblin” (playful), and “goblin’d” (slang);
-
Color scheme: intentionally bright light mode with a “brutalist” design aesthetic, evoking braille documents and echoing the “Blind” theme;
-
Logo: generated via ChatGPT (using existing theme as context prompt);

Marketing
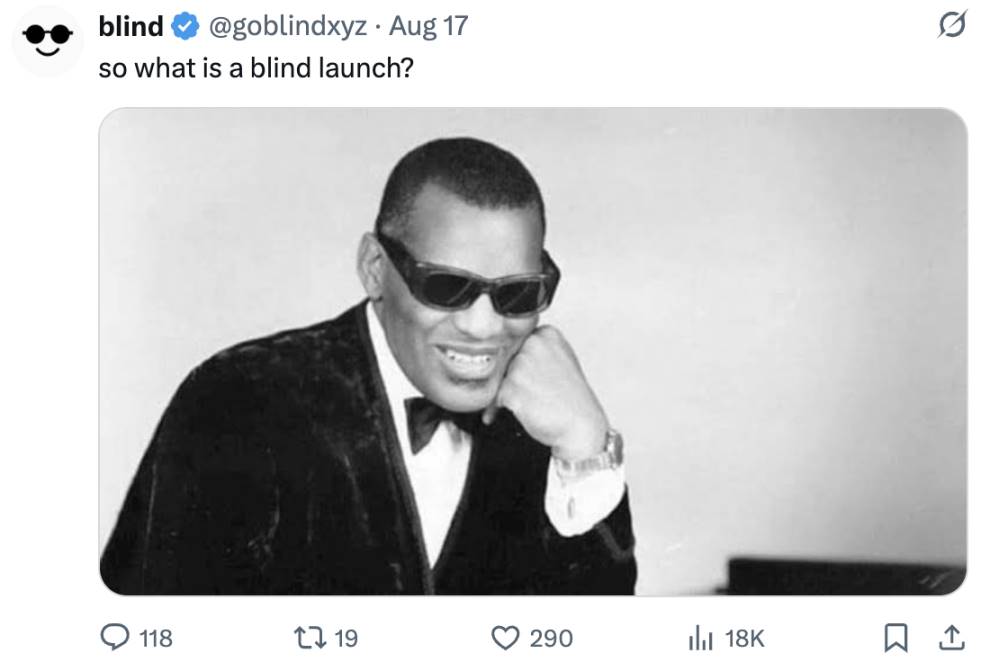
Time to let the world know about our MVP! Usually, the best way to get attention isn’t direct announcement—but by creating confusion.
Confusion Marketing
Before full promotion, ensure the MVP is fully functional. Ideally, start marketing a week before launch—this concentrates public attention and increases chances of trending on social platforms.
Core goals for this week:
-
Get more people to follow the project’s X account and turn on notifications;
-
Post vague teasers and memes—never explicitly reveal functionality;
-
Drop “clues” so commenters guess and generate buzz organically.
Vanity Metrics: Preventing User Loneliness
An effective companion to “confusion marketing” is a leaderboard! People want to “get in early” but fear being “too early.” Your job: “make the platform feel alive before launch.”
The “registration + leaderboard” campaign offers these benefits:
-
Encourages early sign-ups, distributes traffic, and tests system stability;
-
Keeps users engaged: “Are there perks for early registration?” prompting them to enable notifications;
-
People love feeling superior: leaderboard rankings are highly shareable and reveal fun insights about their accounts;
-
Enables the team to showcase “growth metrics” externally.
Blind surpassed 40,000 pre-registrations before launch!

Note: Adding “referral links” would accelerate growth further.
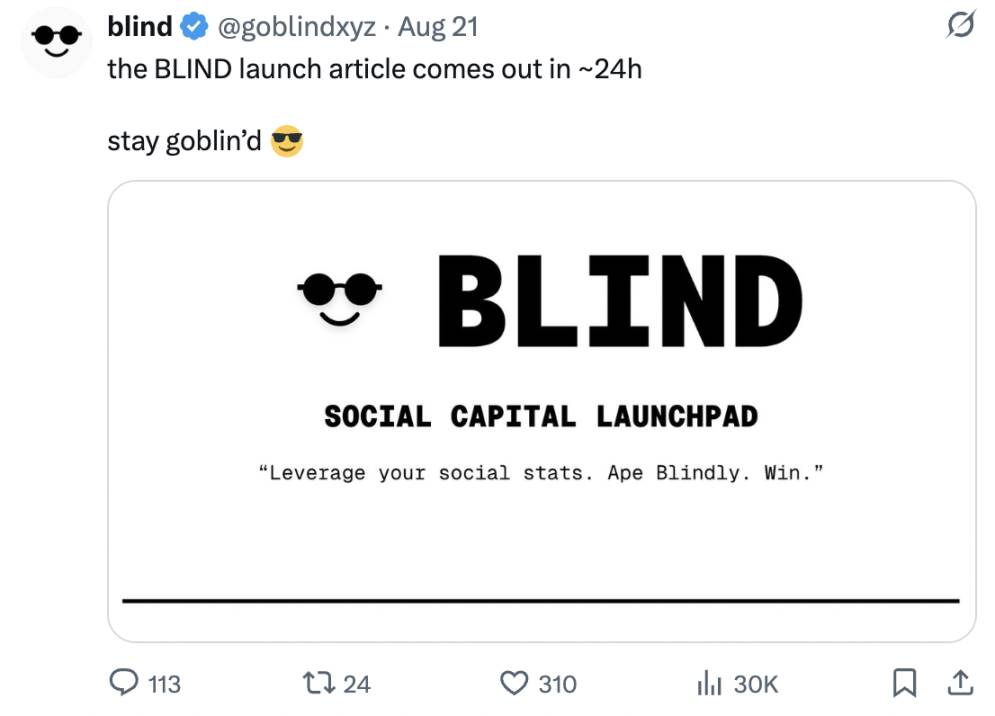
24-Hour Countdown Teaser
Time to reveal Blind’s core function! Publish an article telling users exactly when to expect it. Final 24 hours: lock in your guesses about Blind. A 24-hour window ensures global time zone coverage.
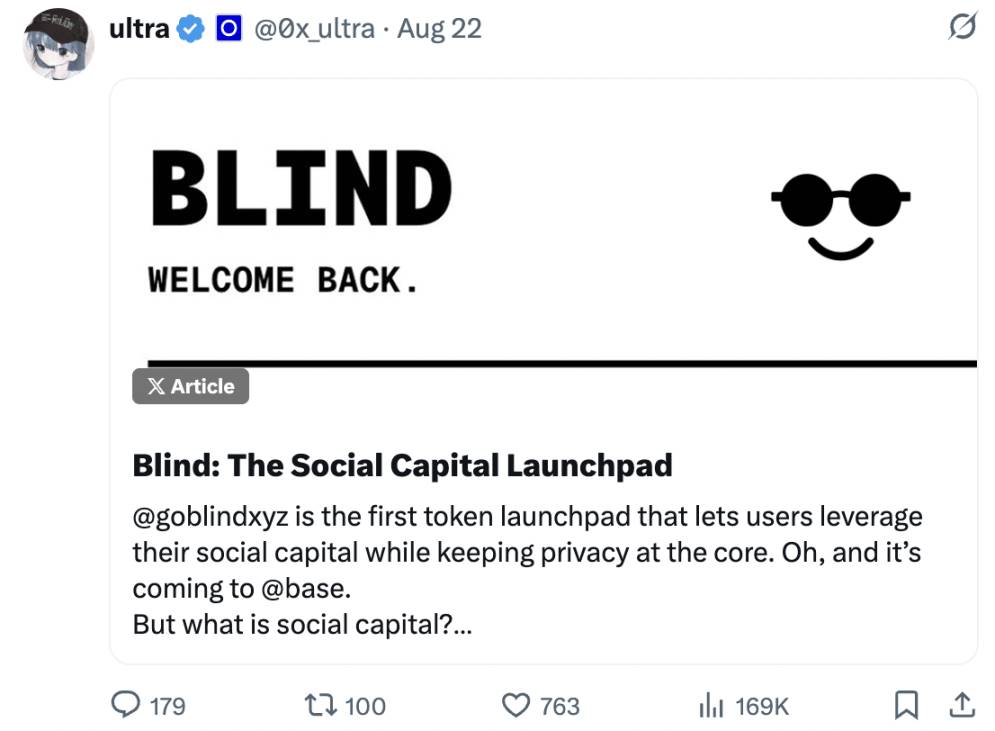
Launch Announcement Article
Now users are refreshing your X profile—time to publish! The article should clearly explain:
-
Blind’s core functionality;
-
Official launch time;
-
No need for excessive technical detail or feature lists—focus on conveying “motivation,” “core idea,” and “project appeal”;
-
If technical details are needed, provide them separately via documentation.
Phase 4: Official Launch!
The article should state: “Launch occurs 24 hours after publication.” By now, pre-registered users are ready and waiting to deploy tokens. Next steps:
-
Switch all environments to production mode;
-
Switch the deployer EOA account;
-
Stand by to handle any launch-time errors (errors will happen).
Alright—official launch!
Conclusion
When building an MVP, always take the path of least resistance. Don’t aim for perfect from day one—iterate and improve in production. Timing often matters more than waiting for everything to be “ready.”
But remember: first impressions are crucial. The initial user experience shapes long-term perception. Don’t expect most users to keep up with “feature updates.”
This side project was incredibly fun to build. I learned a lot—and created a tool people might actually use to launch tokens.
Join TechFlow official community to stay tuned
Telegram:https://t.me/TechFlowDaily
X (Twitter):https://x.com/TechFlowPost
X (Twitter) EN:https://x.com/BlockFlow_News